Showing posts with label Cheesecake. Show all posts

Tuesday, March 31, 2015

The Peanut Butter Overload Cheesecake


For my brother's birthday cake, he had one request: Peanut Butter. Upon further questioning, he said a cheesecake would be acceptable. So, Mom and I set out to make it contain all the peanut butter that a sane person would want and maybe a little extra for good measure.


Now, just a fair warning... Not only is this cheesecake peanut butter-y, but it's so rich. This cheesecake lasted for a good five days with four people eating it. I think that might be a record...

Also, this was my first time making a cheesecake and it was so much easier than I thought it would be!

The Filling:
  • 32oz of cream cheese
  • 5 eggs
  • 11/2 cups of brown sugar 
  • 1 cup of smooth peanut butter
  • 1/2 cup cream
  • 2 tsp of vanilla
  • 1 pinch of salt

The Crust:
  • 2 cups crushed graham crackers
  • 1/3 cup sugar
  • 1/3 cups cocoa powder, unsweetned
  • 1/2 cup butter, melted
  • 1 pinch of salt
The Topping: 
  • Peanut butter
  •  12 oz peanut butter cups, chopped


I'll start with the crust.
In a bowl, combine the dry ingredients.


Once they're combined, dump it in a spring-form pan. Add the butter to it and mix it around. You can form the crust when you're ready. You can go all the way up the sides or half way. I did it half way because I prefer most of the crust to be on the bottom.


When the crust is to your liking, bake it for 10 minutes at 350 degrees, then set it aside to cool. It's time for the filling.


In a mixing bowl, add the cream cheese, vanilla, salt, and brown sugar. Mix them together until they're thoroughly combined.


Next is adding the peanut butter. Mix it together.


Now, this might taste good, but it's too thick for cheesecake. So, now we add the eggs one at a time. Add a egg, Mix it in. Add a egg. Mix it in and repeat. Once all the eggs are in, add the cream. Keep mixing it until it's nice and smooth.


Once it's all smooth, the filling is done. Pour about half of the filling into the crust. Sprinkle some of the peanut butter cups. Not a lot, just enough so that it's not all cheesecake. Then, pour the rest of the filling on top of that. Then you can bake it. 


Don't forget the water bath. we put it in ahead of time and I think that made all the difference. After the cheesecake had baked and cooled, it didn't crack!


After the cheesecake has cooled a bit, it's time for the final stage... adding the toppings. The topping is simple. Sprinkle the remaining peanut butter cups on it.


And then, put about 2 spoonfuls of peanut butter in a sandwich bag, microwave it for like ten to twenty seconds. Cut one of the corners and proceed to drizzle the peanut butter on the cheesecake. If you don't want to do this part, that's fine, but I think that the cheesecake needs the peanut butter... It's kind of a break from the sugar.


It looks great and tastes AWESOME! I think my dad may decide he wants something like this for his birthday this summer. Now I need to think about what kind of dessert I want for my birthday :-).

This gets 5 out of 5 cat whiskers!
This recipe is a M&D original!

Friday, March 27, 2015

Cheesecake Cookies

I think the person who came up with this is a genius. I mean, cheesecake is good, cookies are good, why not bring those two together to create something awesome!?!?!?


Just look at it. Isn't it beautiful? It's pretty much a mini cheesecake. And it's delicious.

Ingredients:
  • 1 1/4 crushed graham crackers
  • 1 cup of flour
  • 1 1/2 teaspoon of baking powder
  • 1 stick of butter, softened
  •  1 egg, separated
  • 1/2 cup of brown sugar
  • 4 oz cream cheese
  • 1/2 teaspoon of vanilla
  • Raspberry or other pie filling (optional)

The first part is the cookie.

In one bowl, stir together the graham crackers, flour, and baking powder.


Then, in another bowl, you want to beat the butter and the brown sugar. Once those are combined, add the egg white and mix it until combined.

Butter, Bronw Sugar and the Egg White.

For the next part, you gradually add the graham cracker mix to the brown sugar mix. You'll know when its all combined together, when you can make a ball with it.


The second part is the cheesecake filling.


For this you beat the cream cheese, egg yolk, sugar, and vanilla until its all nice and smooth.


The last part is bringing it all together into an awesome cookie.


The first step is to scoop the graham cracker dough onto a cookie sheet. I used an ice cream scoop.


Once they are all scooped, the second step is to shape them into bowls.


The third step is to add the cheesecake filling. Now, this could be the last step, if you want a nice  vanilla cheesecake cookie.


Or you can add a little raspberry pie filing before you put the cookies in the oven. We've had them both ways and I think everyone prefers them with the raspberry filling. It's up to you... why not try both?

The next step is to bake them. They bake at 350°F for about 12 minutes or until the cookies are golden and the filling is barely set. Once they were cooled, we stored them in the fridge. This cookie really blows the boring cookies out of the water at parties, be prepared and bring a couple of copies of the recipe to share with others :-).

Enjoy!

This recipe gets 5 out of 5 cat whiskers!
The original recipe can be found here.

Wednesday, February 5, 2014

White Forest Cheesecake Cake


Twas a couple weeks before my Brother's birthday, and he wasn't saying what kind of cake he wanted... so the creative license was handed over to Mom and me. After looking around on Pinterest and other places Mom came across this recipe on Facebook. We decided to do this recipe, we just changed a couple things.


We decided the cake layer would be french vanilla (instead of chocolate) because we thought that would go better with the cheesecake. We also used 2 tsp of amaretto in place of vanilla. For the frosting we mixed one can of pre-made cream cheese frosting with half of Mom's regular white frosting, that way the frosting wasn't as dense as the pre-made frosting usually is, but it would still have a nice cream cheese flavor. We also gave the finished cake a light dusting of powered sugar.

Greased and Parchment lined spring-from pan

Preparation
We used spring-form pans for both the cake and the cheesecake. We cut parchment paper to fit the bottom of the pans. Then I greased it with shortening half way up the side, and on the bottom. next, the parchment paper was placed in the pan. Also, a brownie pan with hot water is placed on the bottom rack (to keep the cheesecake from cracking).

Cake batter

Cake

The Cake
1 box of french vanilla cake mix. We made it according to the instructions and then poured all of it into one of the spring form pans and then baked according to the box.

Cheesecake batter

Cheesecake

The cheesecake
The oven was set to 325 degrees. For the cheesecake, use two 8-ounce cream cheese packages at room temperature, 1/2 cup of white sugar, pinch of salt, 2 eggs at room temperature, 1/3 cup of sour cream, 2 tsp of amaretto or 1 tsp of vanilla (your choice) and one can of cherry pie filling. First, beat the cream cheese until it's workable, which is about 2 minutes. Next, add the sugar and salt, letting it mix for another minute. After that, add the eggs one at a time. Then, add the amaretto and sour cream and mix until smooth.

Next step: pour the batter into the spring form pan and open the cherry filling can. Then, using a fork, pick cherries from the can and scatter them in the cheesecake. It's easier if you put all the cherries in first and then use a knife to swirl them into the cheesecake. Bake for 45 minutes.


Avengers assemble!
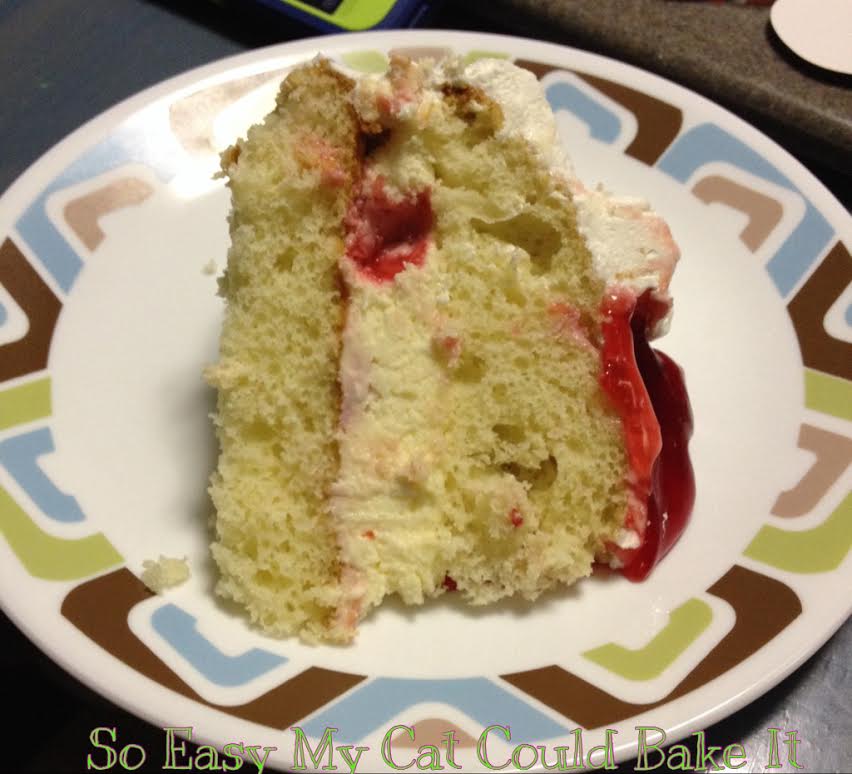
After both cakes have cooled, the cake assembly is next! The first step is to cut around the edge of the pan so that the cakes don't rip when you release the spring. Then once you've released the spring, slice the cake into two layers. Put the bottom layer on the plate, then stack the cheesecake layer on top of the cake layer, and finally the last cake layer on top of it all.

We frosted the sides, then the top and Mom made this ledge/fence on the top with the frosting to keep the cherries in place.
My thoughts...
This was so awesome! It was perfectly balanced... it wasn't too sweet at all. This reminded me of an ice cream cake. 5 out of 5!