Showing posts with label beginner baker. Show all posts

Friday, February 14, 2014

Chocolate Sour Cream Bundt Cake


Are you ready for this?

This recipe is chocolate with chocolate and then even more chocolate! I mean it's so chocolatey that if you don't smile when you take a bite, there could quite possibly be something wrong with you.

This bundt cake is a chocolate sour cream cake, which is good, but what takes this over the top and knocks your socks off is the ganache and the cake together.

The cake

The extra
The cake
You will need 1 cup (Plus extra for dusting the pan) cocoa powder, 7 1/2 oz. of semisweet chocolate (finely chopped or chocolate chips, for melting), 1 cup boiling water, 2 1/4 cups flour, 1 1/2 tsp. baking soda, 1 1/4 tsp. salt, 20 Tbsp. (2 1/2 sticks) of butter, 2 1/2 cups brown sugar (firmly packed), 5 eggs, 4 tsp. vanilla, 1 1/2 cups sour cream, 1 1/2 cups semisweet chocolate chips. They all must be at room temperature.


The first thing to do is to grease the bundt cake pan* and dust with the extra cocoa powder. I tapped out the excess over a bowl.

Dusted pan

Boil some water. While you wait combine the flour, baking soda and salt in a bowl, and whisk it together.

Next, combine the cocoa powder and 1 cup boiling water in the bowl you tapped the excess in. Once the cocoa powder is dissolved add the chocolate for melting, and whisk until the mixture is smooth.

Chocolate, cocoa powder, boiling water mixture.
Now it is time to beat the butter until it's creamy. Once it's creamy, add the brown sugar. The combination should be light and fluffy before you add the eggs one at a time. Then add the vanilla.

Brown sugar, butter, eggs and vanilla.

Then, while at a low mixing speed, add the sour cream and flour mixture. You want to alternate between the two, starting with the flour mixture and ending with it.

Once that is combined and mixed well, it's time to add the chocolate mixture. Mix it until you can see no white streaks. Finally, add the chocolate chips.

The batter.
Now, you pour the batter in the pan. You only want to fill the pan 3/4 of the way. I baked both the bundt cake and the loaf* for 57 minutes @ 325 degrees. Once it's done, let it cool upright for 15 minutes, then flip it over and lift the pan off the cake. You have to let the cake cool completely, which is at least an hour.

While the other dogs took naps, Luna was in the kitchen the whole time with me :)


The Ganache 
You'll need 6 oz. of semisweet chocolate, 2 Tbsp. of butter and 1/2 cup of heavy whipping cream. Put the chocolate and the butter in a bowl. Pour the whipping cream in a sauce pan, and bring it to a boil. Once the whipping cream is boiled, pour it in the bowl with the chocolate and butter. Whisk it until smooth and ganache-like. 

Ganache
Pour the ganache over the bundt cake, make sure  the ganache runs along the sides.

Before the ganache.

After the ganache

My thoughts:
This is the kind of desert that you have to have with a glass of milk or water. This is the kind of desert that they play the funny music for on Unique Sweets, It is very delicious. I think that it has to have the ganache, because the cake by itself was alright... but just by itself it tasted like it was missing something. This recipe is 5 out of 5 whiskers.
Einstein
*A thing to note is that this recipe is orginally from Williams-Sonoma, and the recipe was made for their anniversary bundt cake pan, which holds 15 cups. So if you don't use that cake pan, like me, you will have extra batter. I put the extra batter in a loaf pan, but you could put it in cupcake pans. Whatever you do, just make sure you grease the additional pan too.


The recipe is from here.  

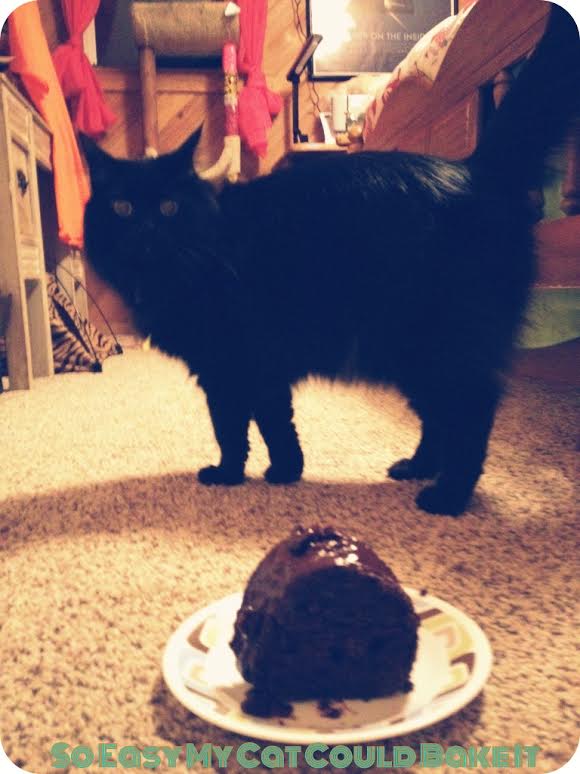
No cats or dogs ate any chocolate in the construction, consumption or photography of this desert . This was strictly a human desert. In fact, the cats seemed rather offended that I placed this by them to take pictures.

Tuesday, December 10, 2013

Buttermilk Biscuits: The Sequel!

Well, I tried the recipe again. I got the same results... At least the recipe is consistent!

They look like cookies... Cookie Biscuits.

This week is quickly becoming "buttermilk biscuit week."  I'm not moving on to a different subject until I successfully make a batch of biscuits!

The two requirements I have for a 'successful' batch is that they have to rise and they have to taste good.

So, for the rest of the week I'm going to watch videos, because seeing is believing.

Tuesday, November 5, 2013

Sweet Potato And Applesauce Dog Treats

Charlie being so patient while I took his picture

For this post it is So Easy My Dog Could Bake It, because I am going to share and blog about a dog treat recipe I tried. With all of the news about treats and food from China being bad for dogs, I thought I should look up making dog treats. This is also good because you can save a bit of money making them yourself rather than going out and buying them.... and with 5 dogs currently in the house, saving money when you can, is important! 

This recipe was very simple to make and I think it is safe to say the dogs like them!


Sweet Potato
The recipe calls for four ingredients: 1 cup of sweet potato, 1/4 cup of applesauce, 21/2 cups of  flour and 2 eggs. I put the sweet potato in the microwave for about 5 minutes after I poked some holes in it, and then I scooped the sweet potato out of the skin.

Applesauce
 One of the things I learned with this recipe is it is really easy to make applesauce. You can either cut up the apples and put it in the microwave for 4 minutes with a tbsp of butter or you can do it on the stove with some water and butter. I did it in the microwave. And after I mashed it a bit I put it in the blender to cut the skins of the apple (but if you peel the apples you don't have to do this). Or you can use store bought applesauce, but frankly, I think this is more fun and I like how you know what is in it if you make the applesauce yourself. And it was just a good learning experience :-)

Apple and her cookie. She was not in the mood to leave it alone on her paw.
The Dough
Something I noticed about the dough was that it was extremely sticky, just about as sticky as a wet cookie dough. But in the end it was all right, I just had to put a little flour down on my counter-top so that it was easier to remove after rolling it out.


Bedtime treats

Another thing about making dog treats is cutting them. I did not use a cookie cutter, I just used a knife and cut them into two different sizes... the ones above and the ones below.

Training treats
They were in the oven at 350 degrees for about 20 to 25 minutes.

Overall I would say that these were a hit! Charlie followed me for a good 10 minutes after he ate his :-) I stored them in two separate sandwich bags... one for the small treats and a different one for the larger treats. It's been a couple of weeks and they still taste great! Oh, the most important thing... they are good for humans too! 

The link to the recipe is Here

Sunday, October 6, 2013

Peanut Butter Bon Bons

Are you in the mood for a peanut butter cookie? And I don't mean a cookie that has peanut butter and chocolate or some combo like that, or your boring, standard peanut butter cookie.... I am talking about a cookie that is just peanut butter. Well, if you are, check this out...


This guy is call a Peanut Butter Bon Bon, but it's not a true bon bon because it's not rolled in cocoa powder or dipped in chocolate... so really it is just a Peanut Butter Bon... see what I did there? LOL!


I'm going to do my best to describe this... have you ever tried to eat just the peanut butter part of a reese's cup? Now imagine that peanut butter goodness as a cookie.


Baking these are so simple, you just have to be vigilant. You want to take these out of the oven as soon as they start to get golden... no later! Taking them out when they start to get golden helps them stay moist on the inside and just a bit crispy on the outside... like a thin shell protecting the chewy peanut butter. A fun thing with this recipe is that instead of spooning them onto the cookie sheet, you roll them into balls and then place them on the cookie sheet, this helps them keep the shape of circles.

Overall this is like a all time favorite for my family, so this must be a 5. My grandma says we should make them into full-fledged bon bons and dip them in chocolate, but I don't know... sometimes you just want the peanut butter and not the chocolate.

Tuesday, September 24, 2013

Milk-Chocolate cookies

What it looked like outside
What do you do when it looks like this outside? Why, you read a good book (sometimes more than one) or bake some cookies! In my case, I did both!  After I was done with my school work I read. And then my Brother and I baked some cookies...


These  lovely little guys go by the name of Milk-Chocolate Cookies. We found this recipe in Mom's favorite cookie cookbook, Martha Stewart's Cookie Cookbook  
http://www.amazon.com/Martha-Stewarts-Cookies-Treats-Share/dp/0307394549/ref=sr_1_fkmr0_1?ie=UTF8&qid=1379860730&sr=8-1-fkmr0&keywords=martha+steart%27s+cookie+cookbook 
and we gave it a shot...
Einstein and the cookie. He kept looking at me like " Why are you putting this here?"

Thoughts...It went good. A couple things to note though. Once all the ingredients have been mixed into the batter, let the batter sit for a minute or two. This will help when you're spooning it onto the cookie sheet, that way the batter is not as runny. Another thing to note, is when the recipe says to put parchment paper onto the cookie sheet... DO IT! Or else when you are using the spatula to get them off of the cookie sheet, they will look like this...and this is with a non-stick cookie sheet.


Of course this doesn't effect the taste, it just makes them fun to eat and look just a tad silly!

The taste test - drum roll please! These cookies are chewy and chocolatey, which is one of the best combinations you could possibly come up with. Sometimes the top will come off as if it is a shell on top of the slightly gooey bottom.... What a fun little cookie!

One thing to note is when they start to crackle on the top and you can see inside a bit, they are ready to take out of the oven.
On a scale of 1 to 5, I just might say these were a 5 (the highest my scale will go!)


Sunday, September 22, 2013

Cranberry Pumpkin Bread

Hello! Pumpkin season is just about upon us - you know, that time of year when every doughnut, coffee, and bagel shop has that delicious pumpkin doughnut, or pumpkin coffee, or pumpkin bagel. So, that means it's time to talk about my favorite pumpkin recipe... quite possibly, of all time... Cranberry Pumpkin Bread.

Just out of the oven

The best way to describe it is it's like a muffin, but instead of baked in a muffin tin it is baked in a loaf pan. It's moist and soft, and so delicious with  a little butter spread on top. When you bite it you get the nice sweet taste of pumpkin and the lovely kick that the cranberries add. I'm not saying the cranberries make it tart or sour, they just make it a party in your mouth!

Out of the pan

Thoughts... One of the things I love about this recipe is it's really simple. Baking this went really smoothly... I think you have to be really, really skilled to mess it up.

The taste test - drum roll please! One word... Yummy! This is just tasty as can be. 


 P.S. I just realized I should have taken a picture of a slice of the bread and not just the whole loaf :-/ I'll do that the next time I bake a loaf or two!


Saturday, September 7, 2013

Overlooked Baking Mistakes

So, last Sunday I was baking a Cranberry Pumpkin Bread. It tasted great when everything was done, but I made some mistakes. Not mistakes that affected the taste or anything, but these mistakes made my bread look funny. There were two mistakes... Mistake #1) I did not put enough batter in the pan so after it was cooked and out of the pan, they looked very short. Mistake #2) I kept opening the door to the oven! This resulted in them having to bake for longer, and the cool air rushing into the oven also made them sink a bit.

In honor of these mistakes I have created a list I like to call: Overlooked Baking Mistakes.

1) The Yield! Knowing the yield will help you know how much batter to put into each pan. Also a thing to note is if you put less or more batter in your pans, this will effect how long they will have to bake:-)

2) Knowing your oven. Knowing your oven includes, whether your oven is hotter or cooler than the average oven, does your oven have hot spots, and what kind of oven do you have? These questions will determine whether you will have to rotate the pans so it bakes evenly, when you should preheat your oven, and so on.

3) Opening the oven too soon! Yep. I am pretty sure everyone is guilty of this. Patience  Grasshopper!! You have to use other clues! Like, "Whoa that is way too pale! I know that won't be done yet."

4) Over/Under measuring. This can completely throw off your recipe.

5) Over/Under beating the batter. If you over-beat the batter it will be stiff, however if you under-beat the batter, chances are you will come across flour clumps when your eating what you baked later. So you really need to trust yourself and find that happy medium!

6) Folding certain ingredients in to the mix. This is so important for when you want what your baking to be airy, but it is also handy for when you mix blueberries or other fruits that you don't want to get smashed:-)

7) Bake time. It goes without saying that if you bake, say a cookie, too long it will be crunchy and if you bake it for less time it will be chewy - So pay attention to the bake time.

And last but not least...8) The pan sized. The size of the pan will often determined how long your baked goodie will be in the oven. It will also determined how many you can put in the oven at once!

***To prove my mistakes did not effect the taste of the Cranberry Pumpkin Bread... Well, I can't post a picture because they have already been eaten!!


Thursday, September 5, 2013

Simple Vanilla Cupcake with Buttercream Frosting!

Hello!! This is So Easy My Cat Could Bake It, my blog about my baking journey! I chose that name for my blog because Einstein, my cat, is my buddy! Right now I am experimenting with baking to see if it is something I want to continue to do after high school or just continue with it as a hobby.  Each week I will bake a recipe, then write about whether it passed the taste test, what I liked and didn't like, what I learned, and so on.
Out of the oven
So, lets give this a shot, shall we? For my first recipe I chose a simple vanilla cupcake with a vanilla butter cream frosting. Why? I am a beginner at baking, and I was looking at some baking blogs and they all recommended starting with something simple... Something that doesn't have a dozen ingredients. So I went and looked in my cupcake cookbook and there it was. The name of my cupcake cookbook is The Cupcake: 80 Cute and Colorful Cupcakes by Love Food from Parragon Books.


Thoughts... It went really well, though I had a little hiccup with the frosting. When I added the milk it would not mix into the correct frosting consistency and that was because I was mixing it by hand. So I put it in the mixer and it got to that nice frosting consistency.

Einstein trying the frosting!
Nice fluffy frosting
The Taste Test - drum roll please! The frosting: Oh wow! It was awesome! This recipe made a lot of frosting, so I was afraid the amount I put on the cupcakes would make it way too sweet, but nope. It was nice and smooth and it was fluffy! The cupcake: It was also good, but it wasn't as light and airy as a cupcake should be, it was a bit more dense, more like a muffin, I guess. The cupcake wasn't as airy as the cake box variety nor as light as a bakery cupcake. So I think I will have to torment everyone by making another batch :-) FYI, the frosting recipe was also from the cupcake book.
Next time I will try mixing it in the mixer to see if that will help air get into the batter, thus making it fluffier. I will also maybe add baking powder. I did not put it in the mix because the recipe said not to if your flour was self-rising, I wasn't sure about the flour, so I did not put any in.  

Overall: On a scale from 1 (hated it) to 5 (loved it) this recipe was a 4 (liked it)

***Mom said the flour is not self-rising. She gets the all purpose variety because it is used in more recipes.... thus, it's more versatile.